Do you know your value?

So you may have noticed these past few emails of me mentioning a tour packet that I’m working on. Yes, it’s true! I’m working hard every day to put together a DIY Tour Packet to be released with my new website for independent musicians to reference while planning a tour!  Essentially, it’s going to be for musicians who need direction and organization when planning for their next tour, especially if they don’t have a tour manager or assistant to help them. I’m really excited about this and it’s just going to be FULL of information (and photos!) that I’ve learned personally, first-hand, on the road and over the years as an assistant.

There are a load of logistics and check lists for any tour, but the first step is initially booking the dates. Maybe you have an agent organizing your tour, or maybe you are doing it yourself. Either way, you want to get yourself organized and prepared before you start making those calls to save time and frustration. Getting clear about your fees will make booking quicker and easier for everyone!

Here are some tips to creating your rate sheet.

1. Determine your fee
Determining your fee as a musician is not straightforward, so definitely take some time and care into finding what works for you. Here is a wonderful article on how to determine your hourly rate and then from there, buckle down your flat rate. Things to consider is not only the amount of time you play per set, but also the travel time. Travel costs come in step 3.

2. Paying your Bandmates
If you are a solo artist, then you don’t have to worry about this. However, if you have a band to pay, determine their rates and add it onto your solo rate to determine the band rate so you can ensure to earn your fair share. Also, be sure to include in this amount you have to pay your band to rehearse, not just perform.

3. Travel & Hospitality costs
Most of my clients keep travel fees separate from their performance fee, which I think is your best option. Putting this statement on your rate sheet will make it clear:

Arrangements for travel & hospitality costs are additional and are to be specified at the time when an agreement is made between the Hirer and the Musician

So when you have a lead, determine if you will charge for driving, flying, train, etc. and hotel for the duration of your stay. And be sure to say ‘in addition’ to your performance fee!

4. Create a clean, easy to read rate sheet with a chart
Keep it simple and include a chart at the top with your rates, clearly stated and number any additional statements, including the travel and hospitality costs, below the chart.

Even if you aren’t going on a tour and just looking to book shows when you are available, this rate sheet will help save your precious time and energy when negotiating an offer.

Thanks for reading!

Grumpy Cat.

No matter what I do, Grumpy Cat is never amused.

It’s my birthday [Gift for you!]

You guys. I made it.

I made it to my birthday! WOO!

Well, technically it was yesterday, but I think I’m allowed to celebrate all weekend. It’s MY birthday, after all! [Shout out to Johann Sebastian Bach – Happy Birthday to you, too!]

Instead of sharing what’s going on for me or giving you my usual letters, I thought it’d be nice to hear from YOU!

So if you want to give me the perfect present – here it is. I’d love to know more about you, what you are up to and what your goals are!

And for that, I’m giving away a FREE template from my upcoming DIY Five Star Tour Packet to my favorite answer! That’s right, YOU can get a gift too!

So, here’s how this will work. Just comment below and respond with an answer to the following questions:

1. Who are you & where are you?

2. Why did you sign up for MY tips?

3. What have you found most useful from my emails and why?

Don’t be shy, I want hear from you! Plus, you have to do this because I’m the birthday girl!

Send in your answers and I’ll pick the winner next week!

Now excuse me, because….

Cheers to both of us!

Get close with your fans.

Good afternoon, friends.

image
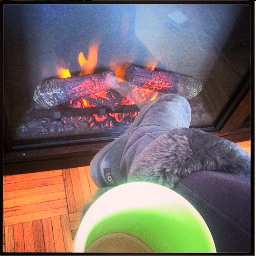
I hope you are having a great week thus far. I feel like all anyone is talking about is how COLD it still is and how no one would complain if the sun came out and roasted us to 100 degrees. (I took that picture on the left that looks like Christmas morning this past Thursday, btw) brrrr.

So I’ll stop here and mum’s the word on the weather…let’s talk about what I came here for, shall we?

A few weeks ago, I assisted in helping my client launch her website, and with that, we coordinated an amazing live stream concert (via Concert Window) to celebrate her re-branding! She had 100’s of viewers tune in, great interaction and also earned a pretty penny (ahem, $400) for just spending 1 hour online!

With a fabulous team behind her and a plan, we pulled of a great show that any other musician, like you,  can do. I have spoken before about which live stream platform to use for these ‘living room’ gigs, but here’s some pointers for creating an effective and profitable live stream show.

imagePromote!
This is the most important aspect of your upcoming living room gig. Give yourself at least a week to promote your event. Send an announcement to your email list, create a Facebook event, post, tweet, Instagram the event to your fans to get the word out!
imageSet the stage.
Yes, this concert might be in your living room. Yes, you could just sit on the couch, in your PJs, and be comfortable. However, this will come off as lazy to your viewers. These people are choosing to spend their time away from Facebook, from going out to see a movie, from washing their hair, to sit down and watch YOU. Take it seriously.

Consider this just as important as a regular show. Use your resources and make your livestream look like a pros.

  • Have a friend with a studio? Ask to use it for your livestream so you can set a professional set. Bring decorations, a backdrop, some props, like CD’s, flowers, etc. depending on what mood you want to convey during the show!
  • If you’re setting up in your home, do the same and be conscious of what’s behind you. You don’t want a boring white wall, or have too much going on behind you that it’s distracting.

imageGet interactive.
Take advantage of having your fans tuned in for this special livestream concert. Many streaming services include chat features. Between songs, take some moments to answer questions, take requests and say thank you to your fans. Have your assistant man the chatroom and feed you questions when you are ready. It makes the show even more intimate and exclusive for your fans – a feature they couldn’t necessarily find during a live show.
imageSound check, check, 1, 2, 3, check…
The look is important, but the sound is just as important for the show. What’s the point of performing your songs for this live stream or answer questions during a live q&a if no one can hear you? Take a few minutes to warm up and do a sound check just like you would for a live show. Make sure people will be able to hear you when playing and speaking.

This is where having an assistant is helpful, they can check on another computer for sound, or during the show, let you know when to adjust your volume in playing or speaking!
imageCover charge?
If you have an established following, you should charge cover for your show. Concert Window makes it easy for your viewers with a pay what you want cover charge ($1 minimum), so people can watch for the small amount of $1, but can also pay more if they’d like (bonus!). Plus, Concert Window processes payments to you within 24 hours after your show.

I believe live stream shows are a great addition to add to your streams of income as a musician – just read this success story from a pianist who starting using ConcertWindow!

So if you have an upcoming milestone, like a record release or tour, set it off with a livestream show! Even if you don’t have such a grand event, utilize a livestream concert to connect and sustain a great relationship with your fans. And that’s always a good idea.

Behind the scenes of my Photo-shoot!

Hello readers!

The branding process continues to be exciting – last weekend, I had a photo-shoot to get new photos for the upcoming website! Okay, sure, I’ve arranged and assisted on plenty of photo-shoots for my clients, but have never been on the other side of the camera. So needless to say, I was both excited and nervous.

When I am asked to assist on a photo-shoot for my clients, it usually involves:
– Making sure everyone knows when / where the shoot will be
– Picking out outfits
– Assisting in carrying said outfits or props
– During the shoot, I just make sure my client is comfortable; I suggest angles if I see the opportunity, and basically keep up positivity for my client and make sure they are comfortable!

Never being the one being photographed, I never truly related to my clients or was able to say that I’ve experienced a photo-shoot. But now, I’m proud to say I can give some input and advice if you are going on your first (or 100th) photo-shoot!

Enjoy my story being on the other side for once, as well of some things I learned from the experience!

Surround yourself with positivity!
This was the most crucial thing for me the day of the shoot. I asked my friend, who graciously did my makeup, to stay while the shoot began for not only photo taking, but moral support. She was a close friend, so she was able to make me laugh and ultimately relax!
She gave thumbs up, said encouraging words, saying things I needed to here! Sure, they were subtle and seem silly, but it made a huge difference to have a friend or assistant to lighten the mood and in the end, relax and give you confidence. By the end of the shoot, I was making silly faces at the camera and twirling around!

Play upbeat and FUN music!
Getting ready, I kept it to a nice, chill, relaxed playlist. But, once the shoot began, I switched it up! I wanted powerful and strong pictures, not relaxed and sleepy!
Once we changed the playlist to upbeat, fun and powerful music (think: Beyonce!), the mood instantly changed! I shook out the silly nerves and we all started to have more fun! So put together a playlist of music to play during the shoot that reflects the vibe you want from you pictures. It’ll help more than you know!

Wear your favorites!
For this small shoot, I decided to go with just two outfits. One dress was a color I was using on my website. It was new and I never tried it on before, so when I put it on, I wasn’t absolutely comfortable in it. I was unsure how I looked, which made me stiff and more difficult to relax in front of the camera.

My second outfit wasn’t matching my brand colors exactly, but it was one of my favorite dresses in my wardrobe. It felt great on and also looked great on! Even the photographer reacted with ‘oh yes, I love this dress!’ once I put it on. I shook my hips and twirled around – I was instantly having more fun! Whodathunk! So, lesson learned: pick outfits that you know and love – it will reflect in the photo results!

Quick Pro Tip!
Here’s a ‘pro tip’ I learned on the shoot from my photographer. She said that between each shot, to change my pose slightly so I would end up with a variety of shots to choose from. So for example, in one ‘scene’, between each click, I’d change my head slightly: chin up, chin down, look up, etc. Now I have more to choose from and a better chance at finding the best shot!

Overall, once I truly realized we were really there just to have fun (along with getting that great photo), I could breathe and enjoy myself. So just relax, have fun! It is just photos!

I’ll be looking through photos this week and can’t wait to share them! So excited! 😀

Don’t let it slide…

Hey there!

I hate to say it again, but yes, we had another cold weekend (and a cold week ahead of us!) here in NYC. This has to be the longest winter I’ve experienced! Maybe if I close my eyes and click my heels 3 times I’ll appear on a beach?

Yeah, enough day dreaming. Let’s snap back to reality.

If I think too much about my big dreams or long term goals, I lose sight of my to-do list. Does that ever happen to you? You get so focused on writing and recording for a new album that you miss a deadline for the release? Or you are having a really great conversation with a top guy in the industry giving you priceless connections, and when you hang up, you already forgot that persons name he gave you?

It’s easier than you think to forget important tasks when you are trying to balance your business, your creative process and your life!

We’re not robots who have programmed reminders or alerts that will go off – we’re humans. We need to be realistic and set ourselves up for success in reaching our goals.

Whether you are tackling your to-do list on your own or with an assistant, here are some tips I myself use to keep me on track and crossing off things on my to-do list!

1. Don’t count on remembering.

If you are in a conversation and you are conjuring a great plan, say, book a tour next year, don’t count on remembering the conversation after you hang up. Write down dates, names, notes, ask for spellings while in the conversation so you will not forget! This saves a ton of time having to a) try to remember or b) having to call back and get the info again.

2. Use your resources.

There are a zillion apps that can keep you focused. I keep it simple by using Google Task Bar with my gmail account. Take a look at a snapshot:

I’ve blurred this mail account, but you can see the Google Tasks box in the bottom right-hand corner. To turn it on in your Gmail account, just click on the tasks link on the left-hand side of the screen. You can even make it pop-out and open in its new window.

With it, you can quickly create a list to check off for yourself. The great thing about it is that it stays open when you are in your email, so it’s in your face, every day, all day. If you have a to-do list, you need to put it where you will look, right?!

I use the task list to keep track of any emails I need to send, deadlines, quick tasks and more. It’s also my go to when I do need to be reminded what needs to be done – such a great way to keep focused.

3. Write it down!

Currently, I’m assisting a client release a new album along with the sheet music this summer and there are plenty of deadlines with both products. The checklist includes filling out a new release form by a certain date, submitting the cover art for both the album and the songbook, publish the music, get licensing for certain pieces, proof read the book, and the list goes on and on!

For a large project like this, instead of using a task list, I wrote down the deadlines clearly on an old-fashioned paper calendar so that I can see clearly the month(s) ahead and remind my client of the important deadlines. Visually seeing the timeline helps me immensely and I highly recommend it for anyone.

4. Delegate – The most important part!

There will always be more to do than you can handle. Delegate the simple & low profit work to your assistant, such as, sending a quick link to a person interested in booking you, searching for a flight to your next gig, sending rehearsal times to your band, etc. Allocating what you need to do will diminish the to-do list for yourself and get things done quicker.

I hope these short tips will help you keep on track of your deadlines so you can make this year amazing!

#TBT

Throwback Thursday to my violin playing days!